hdd and cd/dvd installation , power and data cables.
How to tell if you have an SATA drive
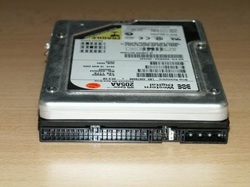
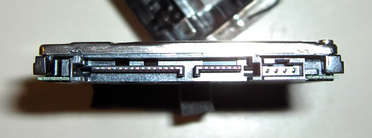
IDE is the old interface standard for hard drives and visual drives. It is easily known by a wide row of pins on the back of the drive, a second set of pins for jumper settings, and a molex plug for power. A SATA drive has much smaller connectors with no visible pins, for both data and power. Some SATA drives come with a molex plug as well. Here are some examples:
An example of IDE
EXAMPLE OF SATA
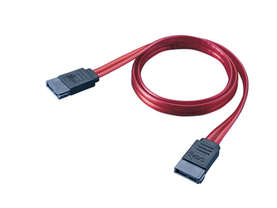
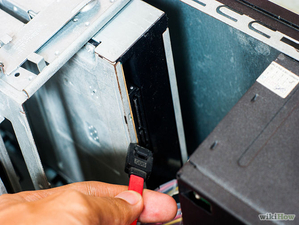
SATA drives use a SATA cable. They a thin, flat cable that are traditionally colored red, and have two black connectors.
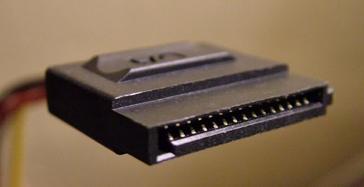
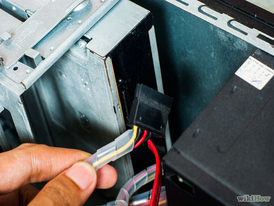
One or the other end of the SATA cable can be joined to either the hard drive, or the motherboard. Some SATA cables come with one angled connector, which can be useful for connections that must go into tight places. In order to power your drive, you'll essential a power connection from your PSU. A SATA power cable connector appearances something like this:
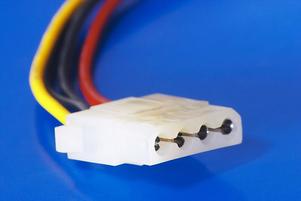
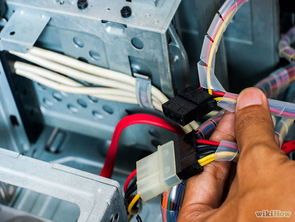
Your drive may also have a port for molex power. One or the other one works the same, but never use both at once! Your PSU will more often than not have a spare molex connector, as opposed to a SATA power connector. If you do not have a spare SATA power connector, your hard drive does not have a molex port, and your hard drive did not come with a molex to SATA adapter, then you'll necessity to obtain an adapter. They are very cheap, but I don't suggest buying one. If you identify someone who is into computers, then ask them if they have a spare. Most of them should have several spares laying around. Here is an example of a molex connector:
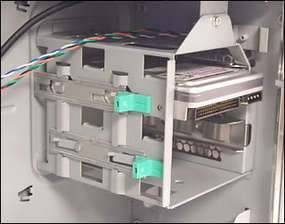
The last thing you need before installing a drive is the space to put it in. Inside your case, note where your present hard drive is located. It should be screwed into a cage assembly, or slid in with drive rails. Is there another space just like it nearby? Are the screwholes in the same placing? Some cages put lettering beside the holes, telling you what they are meant for. HDD stands for Hard Disk Drive (your hard drive), ODD stands for Optical Disk Drive (your CD/DVD drive), and FDD stands for Floppy Disk Drive. Here is an example of what a drive cage looks like:
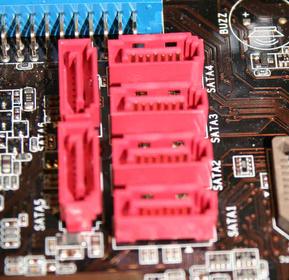
If you have the correct space for another hard drive, then you're set. On a side note, sometimes the FDD space has holes for the hard drive as well. So if you don't have an internal floppy drive, you can put a hard drive in there in its place. Now you need to make sure you have a spare SATA connection on your motherboard. There are normally a few of them convened together, so they shouldn't be too hard to find.
Connecting your drive: You'll need a screwdriver if your case does not use drive rails. Ensure that you have the proper jumper settings. If your hard drive cage is removable, it is easier to install when you remove it from the case. Insert the hard drive into the slot carefully. Push it in until the holes in the cage are lined up with the holes on the drive. Use the screws provided with your hard drive or case to install the drive. If you don't have any, then make sure you use short screws. If the screws are too long, they can end up contacting the hardware of the hard drive, and cause serious damage. Most hard drives install with 4 screws. If you removed your cage, and it normally faces the back of the case, you can keep it out for installing the cables. Insert the SATA data cable into both the motherboard and hard drive. Make sure it is plugged in completely, since failure to do so can cause problems. Connect either the SATA power connector or the molex connector. If you're using molex, make sure that the notched ends of the plug match the notched ends of the connector. Reinstall the cage if essential. If everything is connected properly, then you're set!
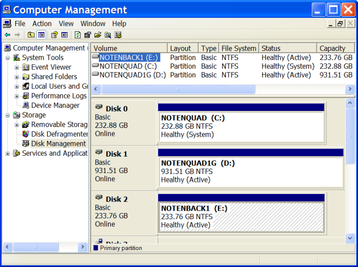
If this is a product new drive, you may need to create a partition on it. Once you boot up your computer, go to the Control Panel. Double-click on Administrative Tools, then on Computer Management. A new window will appear, listing many options. In the tree on the left hand side, click on Disk Management. This will list all of your drives. You should see your main drive (usually C), and your new drive you just installed should appear. The letter it is depends on what other devices you have installed on your computer.
install DVD/CD :
It’s easy to upgrade your computer and install a DVD drive whether it’s internal or external.
Here the steps of installing an external DVD drive :
1. When you buy a new drive is sure to understand the many formats available: DVD, DVD+R, DVD-R, DVD+/-R, DVD+/-RW are a few for example. More current technologies include DVD-DL, HD DVD and Blu-Ray Disc. A covered DVD drive should be able to read and write both "+" and "-" tools and also support recordable (R) and re-writable (RW) technology. Basically look for a DVD+/-RW drive if you plan on recording DVD's, or just a plain DVD drive for reading DVD's (movies, games, etc). There are a diversity of speeds from 2x-16x for a wide range of users and needs; higher speeds will record faster.
2. If you have a USB connection on your computer you can use an external drive. The advantage to an exterior drive is that you can use it on other computers as well.
3. To install an external DVD, just follow the instructions provided with the drive.
3. To install an external DVD, just follow the instructions provided with the drive.
Here the steps of installing an internal DVD drive:
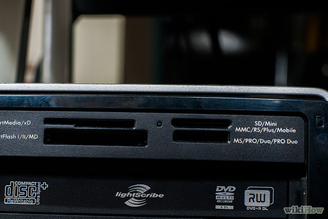
1.Look for a DVD with the letters RW on the box. This is so you can read disks and record them as well. Make sure the speed mark is 16X and that the DVD is dual layer so that it takes care of the latest technology.
2.Read the directions that come with the DVD. It may need you to load the provided CD software before installing the DVD player. Leave the disk in your CD ROM player for the rest of the process.
3. Disconnect the power cord from the back of the computer (goes to the wall socket of your house.)
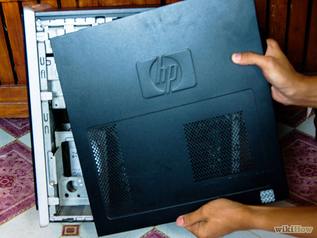
4. Open the computer case.
5. Locate the hard disk or CD drive. Most have two connections and can only be snapped in place one way. One connection is for data and for power.
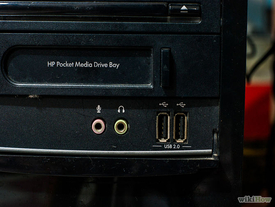
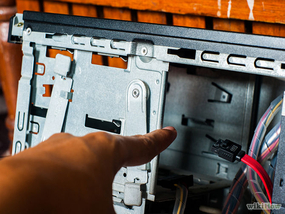
6. Check to see if your computer supports the DVD/CD ROM drives from the inside or if they are pushed through the front panel (remove the plastic panel on some models.)
7. Carefully remove the plastic , cover on the outside of your computer. Make sure you do this only when you are ready to install the DVD drive.
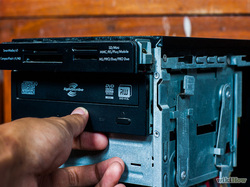
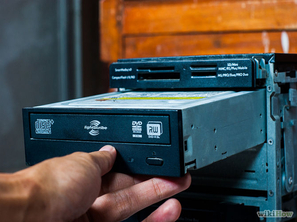
8. Slide the DVD drive into an empty section or bay. If it’s an older computer you can secure it with screws that come with the DVD drive. Many newer computers have spring clips to secure the drive in place.
9. Connect the DVD drive to the data cable. The data cable is widespread like a ribbon and is also called a ribbon cable and has a red stripe on one side. There are two or three connectors on the data cable. One is connected to the circuit board, one is connected to your CD drive or hard disk and one in the middle (optional third connector) is usually not connected to anything. Use the middle connector for the DVD drive. If your data cable only has two connectors replace it with the one that is generally included with the new drive.
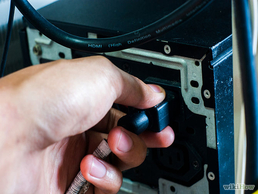
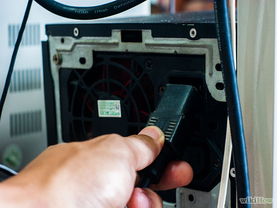
10. Hook the DVD to the power connector. This is a normal round looking cable. There are usually several power connectors in the computer.
11. If you don’t have an available power connector, then you can buy another connector to hook up to the existing power cable. Unhook the power connector and hook it to one side of the new one and hook the DVD to the other side it.
12. Re-assemble the cover and plug the computer back in.
13. When you run Windows up it should look for the drivers for the new DVD player and automatically locate and load them from the CD ROM that you left in the CD player from the first step.
To be safety with any electric part like: the computer. We have to protect us by remove the power from the computer is the first things i have to do. be sure that there is now electric on the computer , so we have to wait 10 minutes to be safe. don't put any of drinks and food near of the machines.
Summary :
In this part I show how can we install the DVD and the hard drive in our computer. I showed it with pictures. there two type of the cables the internal and external DVD drive . so i explained the both of it. all i include the things that we have to do when we come to install any of the devices in our computer what the things that we have to be sure off and how can we protect our selves from it.
References:
Instructions on how to install SATA hard drives, (2011).Retrieved from http://wiki.pcworld.com/index.php/Installing_SATA_hard_drives
How to install a DVD drive , (n.d). Retrieved from http://www.wikihow.com/Install-a-DVD-Drive
